Hacker for Hire

xfs_repair Failures

The Issue

We have a really old SAN that we’ve been trying to migrate off of for months and just been unable to get any downtime time to do it … but fun fact, if you don’t make time for downtime, downtime will make time for you … at the most inopportune time. Such is the case with our SAN that experience a failure due to a phased power outage. Upon returning the parts of the building back to normal, the ESXi / V-Sphere could no longer see the SAN and the SAN no longer wanted to mount the partitions and export them because of xfs errors (more on that at a later time).

Normally, I wouldn’t write something up about this, but ServerFault isn’t letting me post the answer and I refuse to be this guy:

wisdom_of_the_ancients

After running through numerous stack exchange issues and not finding the answer, I landed back in recovery mode … wondering what to do because I couldn’t get the system to mount and it needed to mount to replay the corrupted log.

In recovery mode, a mount produced the following:

mount -t xfs -o ro, norecovery /dev/mapper/... /data
mount: structure needs cleaning
# checking for a /data in a mount command produced nothing :-(

Attempting to run an xfs_repair resulted in a failures and lead me to this Serverfault stack exchange answer; however, this procedure did not work as anticipated other errors seemed to indicate that updated versions of the xfs_* tools would correct the issue (they did not) by using various recuse ISOs (they produced the same output).

The actual issue was able to be identified by checking the dmesg output on the system:

Jan  7 14:47:35 san-storage kernel: XFS (dm-0): Mounting Filesystem
Jan  7 14:47:35 san-storage kernel: XFS (dm-0): Starting recovery (logdev: internal)
Jan  7 14:47:35 san-storage kernel: ffff88204d50a000: 45 46 49 20 50 41 52 54 00 00 01 00 5c 00 00 00  EFI PART....\...
Jan  7 14:47:35 san-storage kernel: XFS (dm-0): Internal error xfs_alloc_read_agf at line 2146 of file fs/xfs/xfs_alloc.c.  Caller 0xffffffffa024bc19
Jan  7 14:47:35 san-storage kernel: 
Jan  7 14:47:35 san-storage kernel: Pid: 1701, comm: mount Not tainted 2.6.32-431.el6.x86_64 #1
Jan  7 14:47:35 san-storage kernel: Call Trace:
Jan  7 14:47:35 san-storage kernel: [<ffffffffa0276e5f>] ? xfs_error_report+0x3f/0x50 [xfs]
Jan  7 14:47:35 san-storage kernel: [<ffffffffa024bc19>] ? xfs_alloc_read_agf+0x39/0xd0 [xfs]
Jan  7 14:47:35 san-storage kernel: [<ffffffffa0276ece>] ? xfs_corruption_error+0x5e/0x90 [xfs]
Jan  7 14:47:35 san-storage kernel: [<ffffffffa024bb40>] ? xfs_read_agf+0x100/0x1a0 [xfs]
Jan  7 14:47:35 san-storage kernel: [<ffffffffa024bc19>] ? xfs_alloc_read_agf+0x39/0xd0 [xfs]
Jan  7 14:47:35 san-storage kernel: [<ffffffffa029bf57>] ? kmem_zone_alloc+0x77/0xf0 [xfs]
Jan  7 14:47:35 san-storage kernel: [<ffffffffa024bc19>] ? xfs_alloc_read_agf+0x39/0xd0 [xfs]
Jan  7 14:47:35 san-storage kernel: [<ffffffffa024bcca>] ? xfs_alloc_pagf_init+0x1a/0x40 [xfs]
Jan  7 14:47:35 san-storage kernel: [<ffffffffa0291350>] ? xfs_initialize_perag_data+0xa0/0x120 [xfs]
Jan  7 14:47:35 san-storage kernel: [<ffffffffa0291e18>] ? xfs_mountfs+0x558/0x6a0 [xfs]
Jan  7 14:47:35 san-storage kernel: [<ffffffffa02a995c>] ? xfs_fs_fill_super+0x25c/0x310 [xfs]
Jan  7 14:47:35 san-storage kernel: [<ffffffff8118c38e>] ? get_sb_bdev+0x18e/0x1d0
Jan  7 14:47:35 san-storage kernel: [<ffffffffa02a9700>] ? xfs_fs_fill_super+0x0/0x310 [xfs]
Jan  7 14:47:35 san-storage kernel: [<ffffffffa02a77d8>] ? xfs_fs_get_sb+0x18/0x20 [xfs]
Jan  7 14:47:35 san-storage kernel: [<ffffffff8118b7fb>] ? vfs_kern_mount+0x7b/0x1b0
Jan  7 14:47:35 san-storage kernel: [<ffffffff8118b9a2>] ? do_kern_mount+0x52/0x130
Jan  7 14:47:35 san-storage kernel: [<ffffffff811ac94b>] ? do_mount+0x2fb/0x930
Jan  7 14:47:35 san-storage kernel: [<ffffffff81140d64>] ? strndup_user+0x64/0xc0
Jan  7 14:47:35 san-storage kernel: [<ffffffff811ad010>] ? sys_mount+0x90/0xe0
Jan  7 14:47:35 san-storage kernel: [<ffffffff8100b072>] ? system_call_fastpath+0x16/0x1b
Jan  7 14:47:35 san-storage kernel: XFS (dm-0): Corruption detected. Unmount and run xfs_repair

Checking a mount command would actually show that nothing mounted successfully; however, the kernel still believed that it occurred, even on a reboot into a recovery (no idea why - it shouldn’t!). Running an unmount -f /data/ /dev/mapper/... resulted in successfully enabling the xfs_repair /dev/mapper/... to execute without the need for the -L flag and allowed for restoration of the data.

Depending on your system, a combination of several of the answers steps would result in restoring the system to functionality. The final procedure identified was:

Gain Access To Partitions

  1. Assumption - you are rebooted into recovery mode or the system is “unmounted”
  2. Identify and make nodes for LVM: vgscan -v --mknodes
  3. Activate LVM nodes: vgchange -a y

Unable to Mount

  1. Attempt to mount the partition using mount, this will likely fail
  2. Attempt to repair the parition using xfs_repair, this will likely fail
  3. Verify that dmesg indicates that you need to umount the partition
  4. Unmount the partition using an umount -f /path/to/mnt/point /dev/mapper/... (note the included the path to the device)
  5. Verify that the partition does not show as mounted in a mount
  6. Run an xfs_repair -n /dev/mapper/... - this should succeed
  7. Optional - inspect each item with an xfs_db by checking each inode to understand what would happen if it was corrected
  8. Run an xfs_repair /dev/mapper/...
  9. Mount the partition using a mount /path/to/mnt/point and inspect for data loss
  10. BACKUP UP YOUR DATA

Clean Mount

  1. Attempt to mount the partition using mount
  2. Run a mount and verify the partition shows as mounted to replay the log
  3. Run a unmount /path/to/mnt/point
  4. Run an xfs_repair -n /dev/mapper/...
  5. Optional - inspect each item with an xfs_db by checking each inode to understand what would happen if it was corrected
  6. Run an xfs_repair /dev/mapper/...
  7. BACKUP YOUR DATA

Tearing Into a Linear GD004-Z

So after 2 years, my z-wave garage door opener bit the dust. I’m a little disappointed because I really feel like it should have lasted longer. As I wait for the other one to arrive, I decided it would be fun to start pulling apart the existing on (it’s broken, right?).

I should note that when I say “broken” I mean that it will no longer lift and lower the associated garage door. The system continues to generate beeps, but the LED never flashes and the door fails to open. Most of my research into the forums seem to indicate this is a common problem and the only resolution is to have the vendor send you a replacement one (so far, I think that’s still probably the best path).

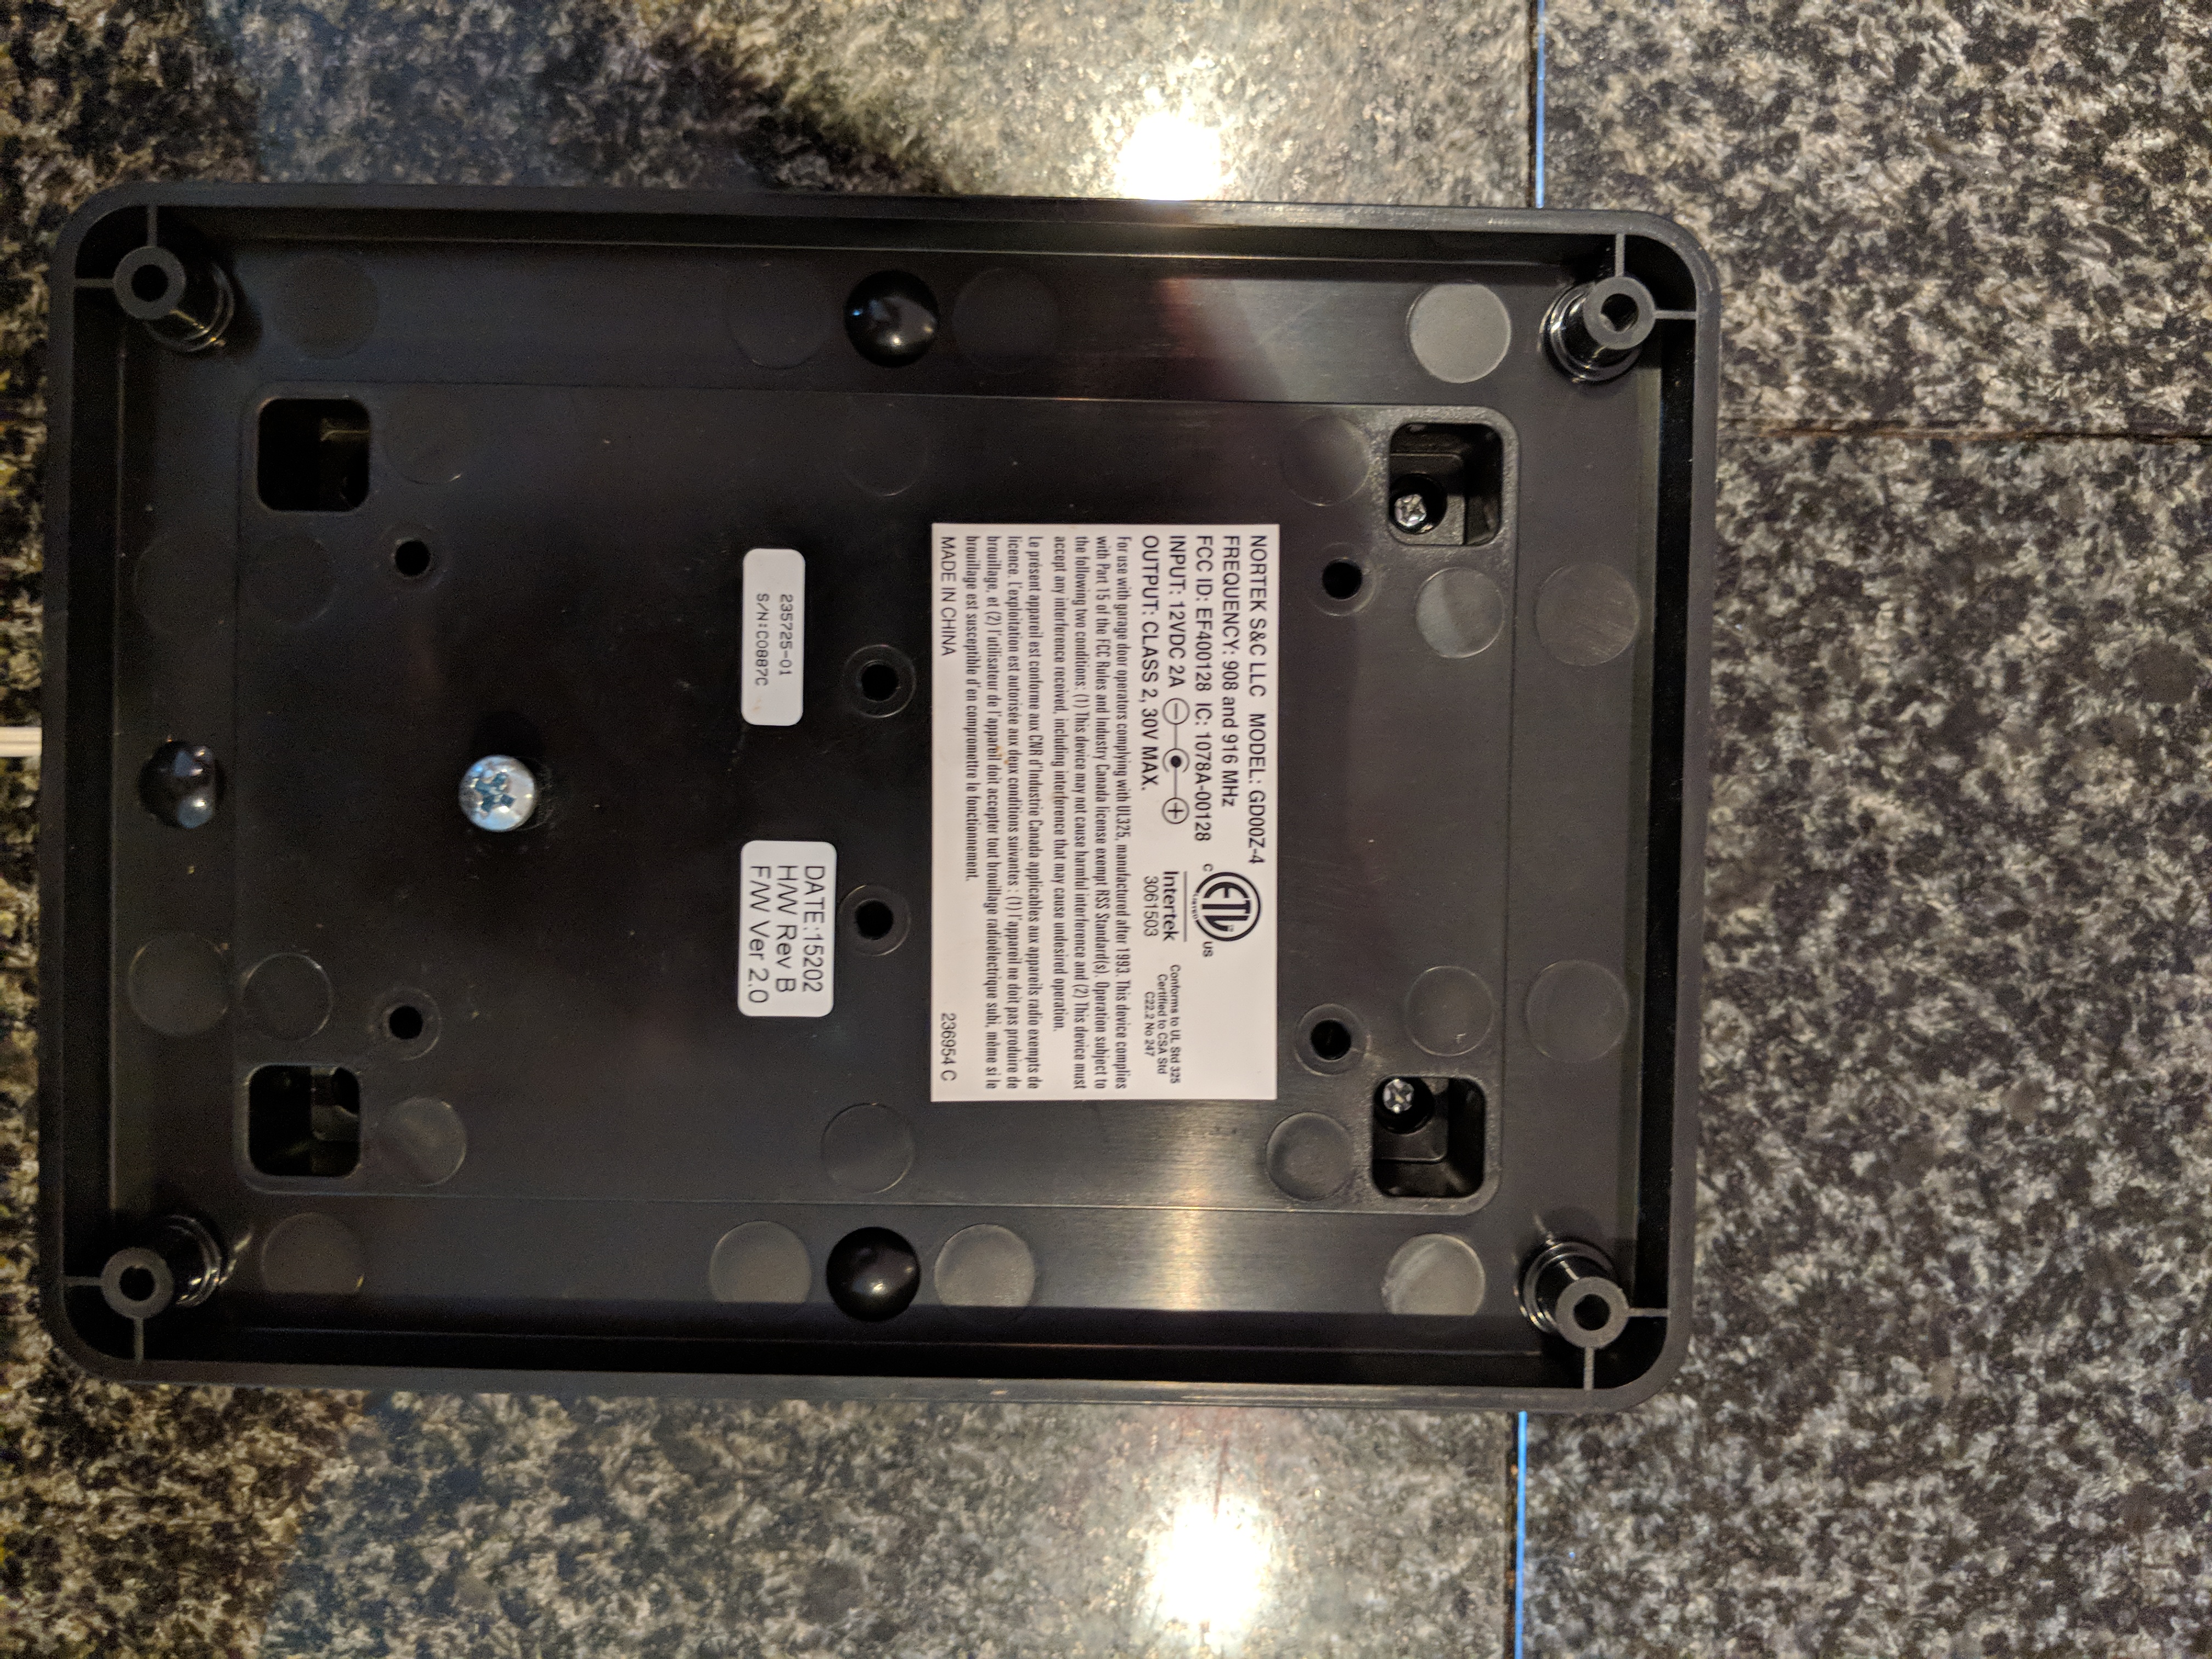
First things first, let’s open it up and see what we have. Removing 4 screws on the back is easy enough:

back plate

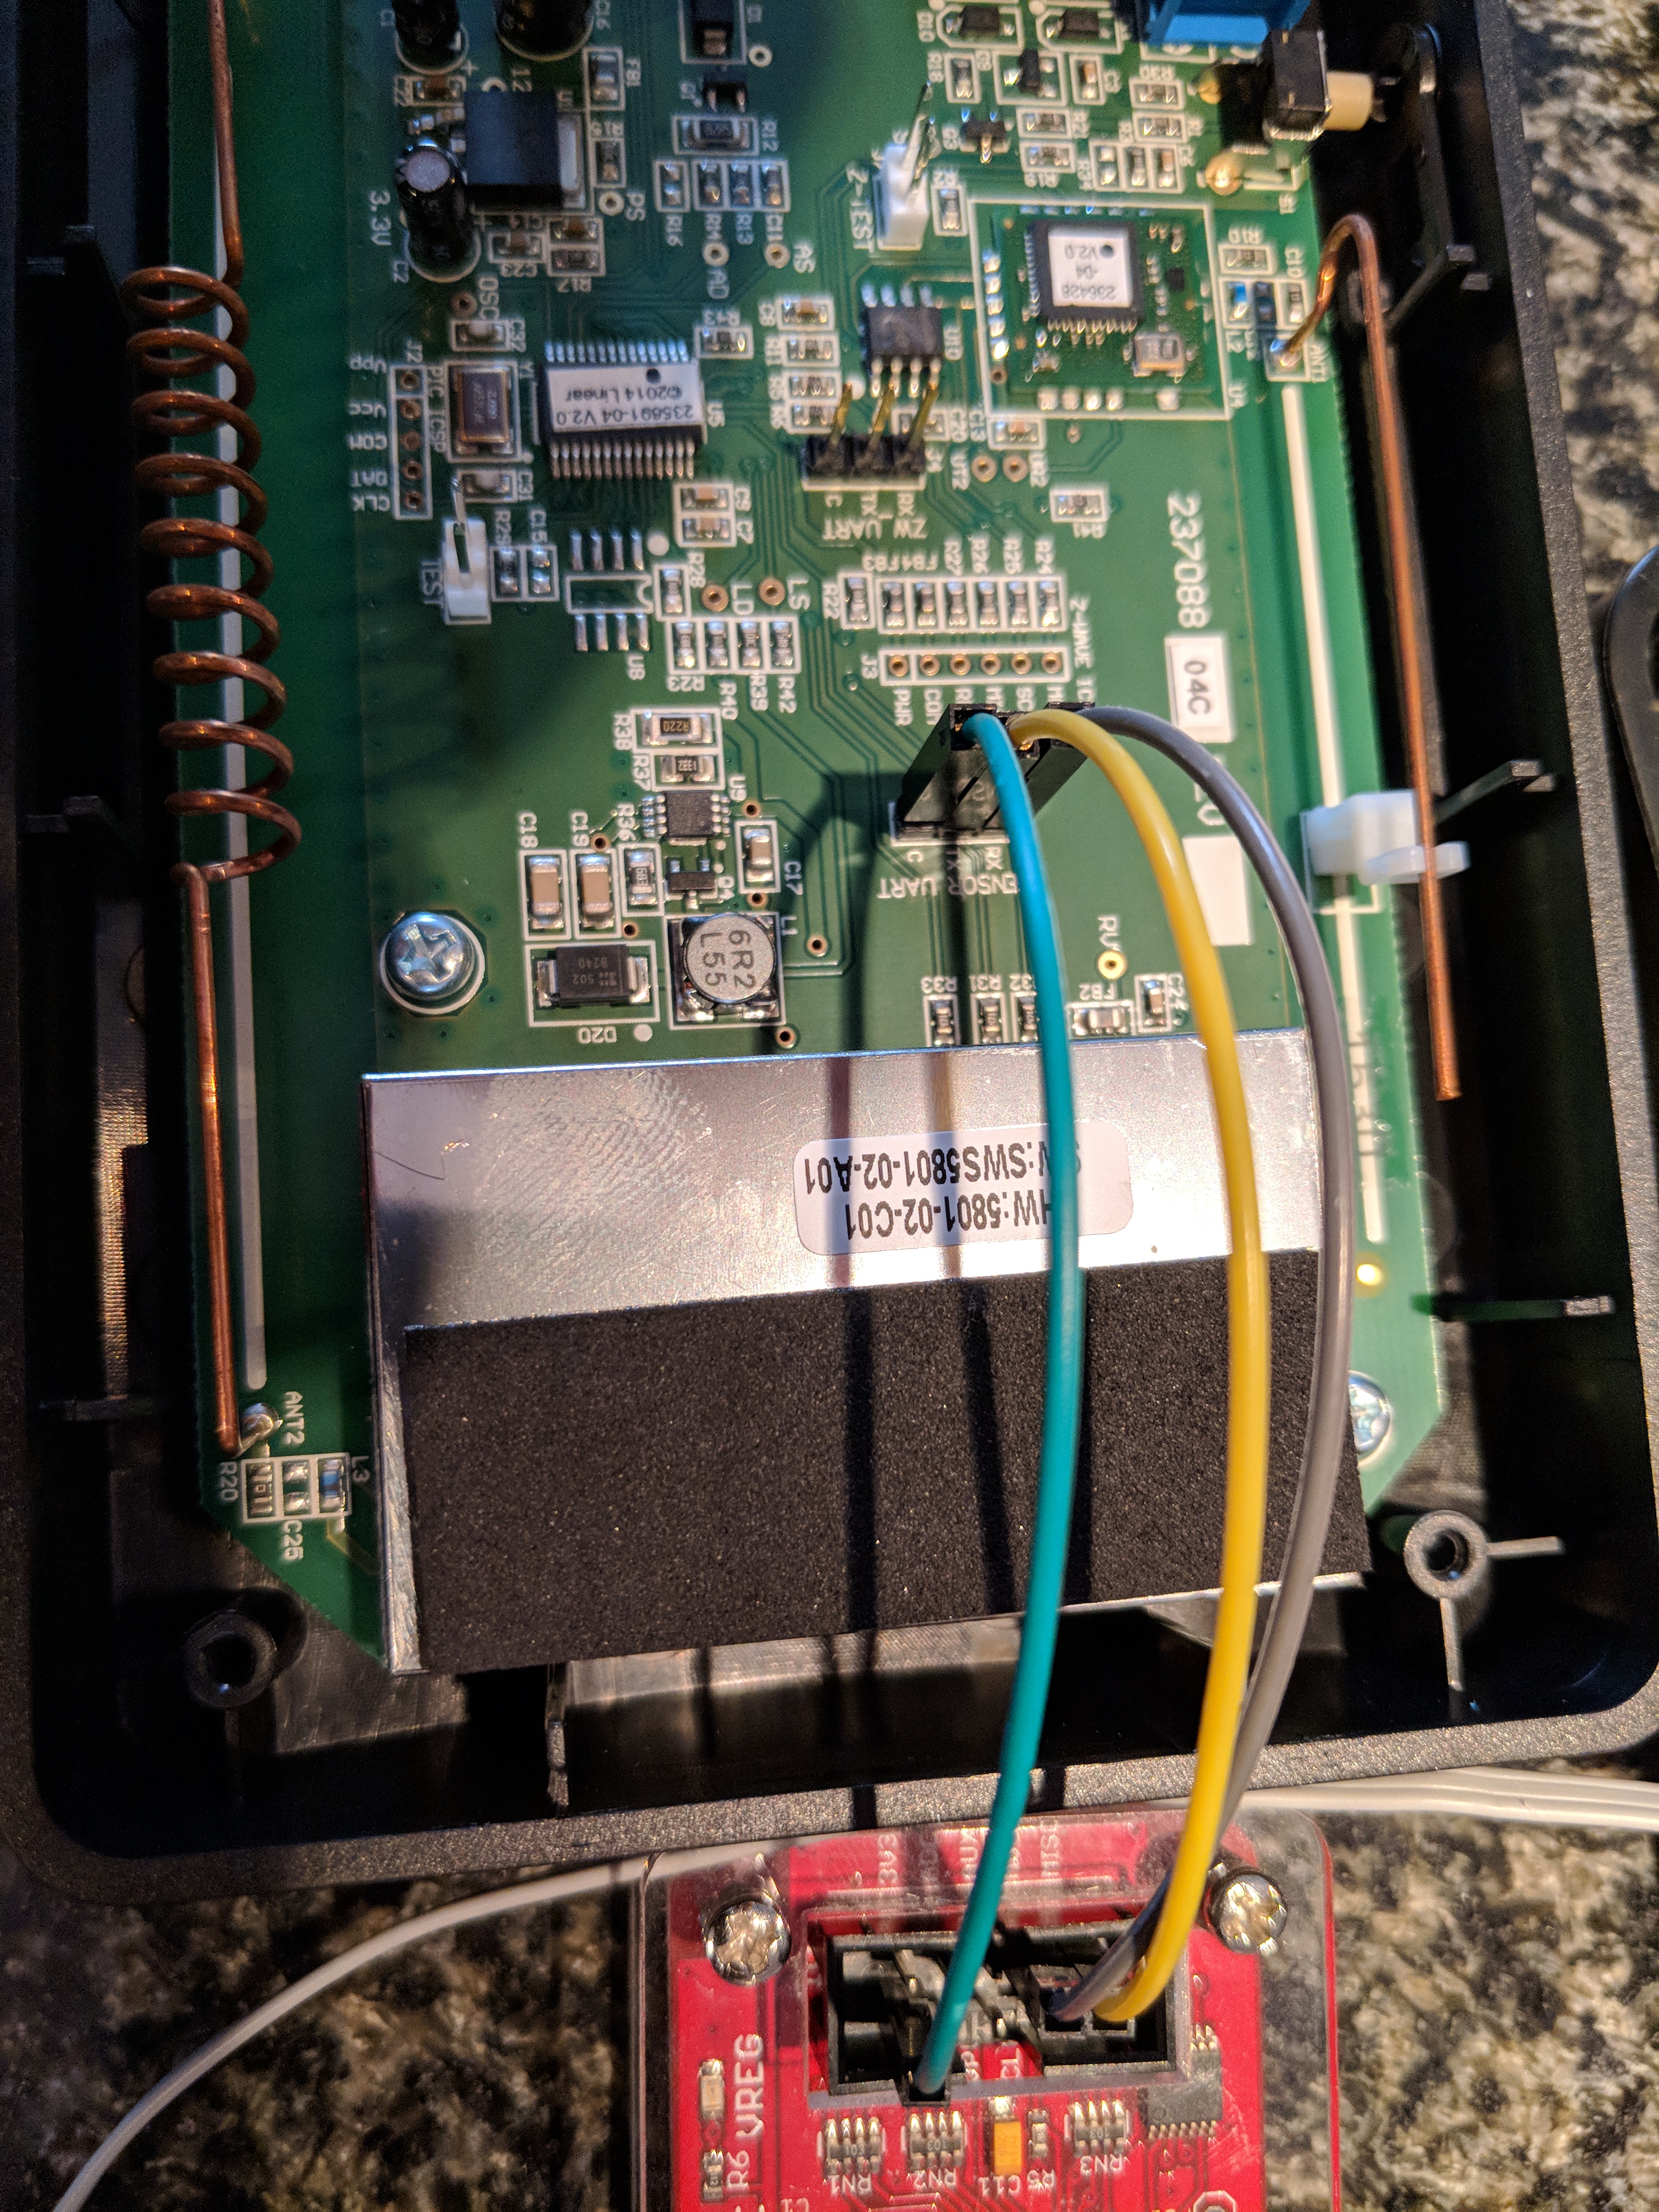
And reveals the following layout:

board

My interest is instantly drawn to the SENSOR UART pins (populated!!!) as a first place to go. If you’ve ever read anything from Embedded Device Hacking, many hardware manufactures will attach associated serial ports to these sytems for testing and debugging access. It appears the same is true for this manufacture.

Initially, I went for broke, and just dropped my Bus Pirate on to see if I’d get lucky:

bus pirate

No such luck … nothing back, no luck with auto baudrate detection … nothing. So it was time to break out the scope. I’ve had an OpenScope MZ that’s been begging to cut it’s teeth on something so put the oscillicope on the TX pin and futzed with trying to get something (anything really) out of the system for an hour or so with no luck. It was about this time I noticed that my red power LED was no longer working and I couldn’t seem to deterime why (everything else seemed to have power on the board).

At this point, I turned to looking at the two jumpers on the sytem. Fortunately, there were only two paths to brute force on it, and jumping both of them resulted in actually getting some reading over the scope

scope

Huzzah! That looks like some serial data if I’ve ever seen it. Now that I’d managed to figure out my combination, I went back to the bus pirate and performed an auto baud rate analysis and it arrived at 19200. Time to fire up some fun with the live serial port monitor; the associated BP settings are:

setting value
mode UART
bps 19200
bits & parity 8, None
stop bits 1
rx polarity 1
output 2 (normal)

And finally…

terminal uart

Well, that’s neat. Pushing the button in test mode results in the following (noisy) output:

LEDs TEST
LEDs TEST DONE
WARNING LAMP TEST
ADC:0x0e18 - WARNING LAMP SENSE -- FAILED
WARNING BUZZER SOUND
ADC:0x0738 - WARNING BUZZER SENSE -- PASSED
RELAY TOGGLE
WALL SWITCH SENSE -- WALL SWITCH IS PRESSED
R345 interface test started.
R345 RECEIVER INTERFACE TEST -- FAILED
Z-Wave interface test started.
Z-WAVE MODULE INTERFACE TEST -- FAILED

Sadly, test mode is boring and basically just a continual loop of doing the above things. I should note that I’m not 100% certain of the accuracy of the above output - but if it’s right, it would clearly explain why my controller doesn’t work in any useful fashion. Another interesting note is the R345 RECEIVER INTERFACE listed. I’d venture a guess that this is the communication between the controller and the door open/close sensor.

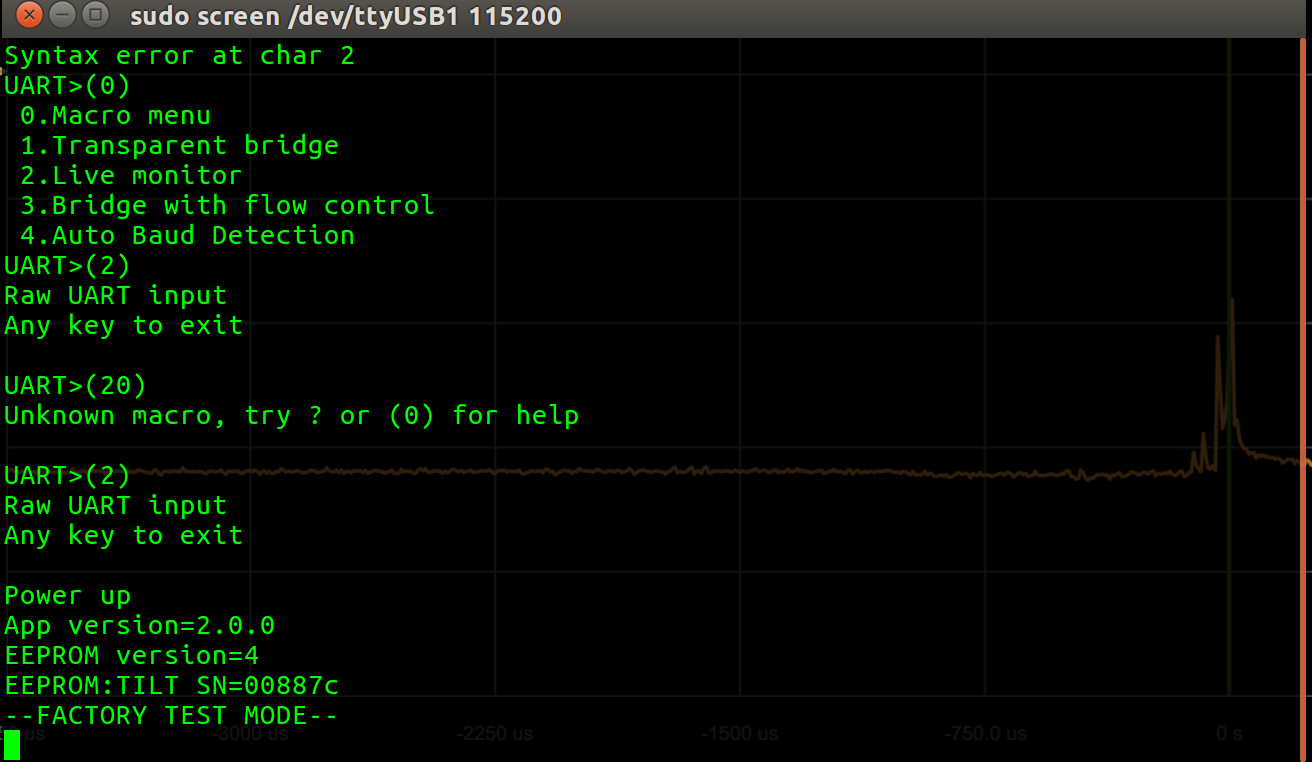
So leaving the BP on and rebooting the system with out the jumpers in place, we get the following:

UART>(2)
Raw UART input
Any key to exit

Power up
App version=2.0.0
EEPROM version=4
EEPROM:TILT SN=00887c
Application firmware by Siva Kathan, Martin Mucciarone, and Mi Jin Park. Z-Wave firmware by Steve Boyle.

The “firmware by” line is only printed after holding the associated button on the board for about 10 seconds and then releasing once you get to a series of beeps that follow in a row.

I also tried putting the BP in transparent bridge mode to see if there was any way to interact with the system, but sadly, it does not appear that there is a direct method of input at this point in time. I’ve considered pulling off the associated firmware images via the ICSP headers (there’s one for PIC and one for Z-WAVE), but that will be an exercise for a later date since this damn thing keeps beeping and there’s only so much I can stand.

Malduino Elite Expansion Pins

I finally got enough time to get to actually play with my Malduino Elite which is a pretty sweet open source USB rubber duck. After dorking around with the base code as well as the Hack A Day code, I wanted to know what else I could do with those expansion pins.

Here’s the details I believe that I have correct - though I recommend you check before you burn out your own stuff, reference information pulled from the ATmega32U4:

  +-----------------------------------+
  | TOP                               |
  |    +------------------------+   O | GND
  |    | ON                     |     |
  |    |   +-+  +-+  +-+  +-+   |   O | VCC+ (5V-USB)
  |    |   | |  | |  | |  | |   |     |
  |    |   | |  | |  | |  | |   |   O | PIN09 - SCLK
  |    |   | |  | |  | |  | |   |     |
  |    |   | |  | |  | |  | |   |   O | PIN10 - MOSI
  |    |   +-+  +-+  +-+  +-+   |     |
  |    |    1    2    3    4    |   O | PIN11 - MISO
  |    |                        |     |
  |    +------------------------+   O | RESET
  |                                   |
  +-----------------------------------+

UPDATE 20170803: Jhonti has confirmed it :)

ESP8266 and SSDP

I recently picked up an Adafruit Feather HUZZAH with the intent of gluing it together with the SmartThings eco system. This presented an initial problem of needing to do SSDP based communications since that's how SmartThings likes to do LAN based communications. After digging a bit, it becamse clear I was going to have to make some modifications to the library.

Site Move

Well, the time has finally arrived that I am going to ditch Wordpress. Wordpress has just become too much of a headache anymore for just maintaining a place where I can complain about things or keep technical notes for myself and I’m no longer interested in having to fight the security beast; I’ll leave that to the young guns at github.io. My hope is that this will encourage me to get back into documenting my escapades since the last posts have always just been because I was updating Wordpress to prevent some new hack.

Building / Publishing the MS Band Light

Wyatt • • Rants

Today I’m releasing my “first” android application into the store. I say first because it’s not the first I’ve written, but it’s the first one that I’ve actually decided might actually be slightly beneficial to someone else so I put it into the store. When the app goes live, I’ll add a link and all that other fun stuff. In the mean time, you can check out details about what the app can / can’t do and the things I learned along the way here.

UPDATE1:

The link is live: https://play.google.com/store/apps/details?id=org.hackerforhire.msbandlight

Things I Learned While Building This Application

veho Muvi K-Series Research

Wyatt • • Rants

I recently picked up a veho Muvi K-Series action camera … and the application on Android didn’t work for anything. So I started down my own path.

Rather than put all the details here, I decided that I was going to primarily work out of a git repo (after the jump) in the event that I decided anything worthwhile should be developed to work with the camera over wifi. What I found was a couple of key points:

Due to the fact that the camera’s quality was kind of terrible (random blocks of video would just jump in and out) and the SD card that was shipped with it was broken and wouldn’t function in anything, I decided to send it back. But I’ve collected all of my comments, code, research, etc. into the muvi_kseries_research repository for anyone else that would like to poke, prod, or build their own application for whatever reason. Enjoy and let me know if you found anything helpful.

Python Zlib … Son I Am Disapoint

Wyatt • • Rants

Every now and then, I find myself digging through some arbitrarily compressed binary and in IDA, when you have to keep doing it over and over again, you should write a script or a loader to handle that (as any good programmer would). So I started wiring up a loader in python and thought that I’d use the zlib library to decompress things … boy was I wrong.  Not only did zlib fail to actually work correctly (because it can’t actually handle ZIP files, more on that in a moment), but the error messages were basically the same low-level messages you got out of zlib’s internal functions. Really? This is the best we can do right now? What I tried:

[wyatt@lazarus:~/Downloads]$ zip derp.zip Untitled\ drawing.png
[wyatt@lazarus:~/Downloads]$ cat Whatsnew.txt derp.zip > file.out
[wyatt@lazarus:~/Downloads]$ python
Python 2.7.3 (default, Apr 10 2013, 06:20:15)
[GCC 4.6.3] on linux2
Type “help”, “copyright”, “credits” or “license” for more information.
import struct
import zlib
f = open(‘file.out’,‘rb’)
c = f.read()
f.close()
offset = c.find(‘PK’)
uncmp_size = struct.unpack("<l",c[offset+22:offset+22+4])
z = zlib.decompressobj()
out = z.decompress(c[offset:],int(uncmp_size[]))
Traceback (most recent call last):
File "", line 1, in
zlib.error: Error –3 while decompressing: incorrect header check

This of course fails because zlib doesn’t actually work right with zip files (you’ll find a vauge note to such things in the ) and of course … I should have really known that ZIP isn’t actually zlib. Instead of trying to be clever, I decided to give up and be lazy. What actually worked:

import subprocess
subprocess.call([‘7z’,‘e’,‘file.out’])
7-Zip [64] 9.20 Copyright (c) 1999-2010 Igor Pavlov 2010-11-18
p7zip Version 9.20 (locale=en_US.UTF-8,Utf16=on,HugeFiles=on,8 CPUs)</p>

Processing archive: file.out

Extracting Untitled drawing.png

Everything is Ok

Size: 24513
Compressed: 22290

So yes … apparently this is the best we can do with the zlib library.